Learn how to configure SCIM with Microsoft Entra ID to provision users to your Staffbase platform automatically.
In this article, you will learn how to set up SCIM using Microsoft Entra ID (formerly known as Azure Active Directory / Azure AD) as the identity provider.
SCIM allows you to provision users to the Staffbase platform using an identity provider. Learn more.
SCIM is optional for user management. You can choose an option based on your business requirements. Learn more about other options.
- The SCIM feature is activated for your organization. If not, contact your Customer Success Manager.
- You have an Microsoft Entra ID tenant.
- You have one of the following permissions to configure provisioning in Microsoft Entra ID:
- Application Administrator
- Cloud Application Administrator
- Global Administrator
- You have the SCIM endpoint URL for your Staffbase platform.
The URL has the following format:https://<your-domain>/scim - You have generated an API token with administrative access via the Staffbase Studio.
You need to create an enterprise application to manage your user provisioning.
Staffbase recommends creating a dedicated application to maintain users for your Staffbase platform. You can use a single enterprise application for both SCIM and SSO for your user management.
- In Microsoft Azure, under Azure services, click Microsoft Entra ID.
- Navigate to Enterprise applications.
- Click New application.
- Click Create your own application.
The Create your own application dialog opens.
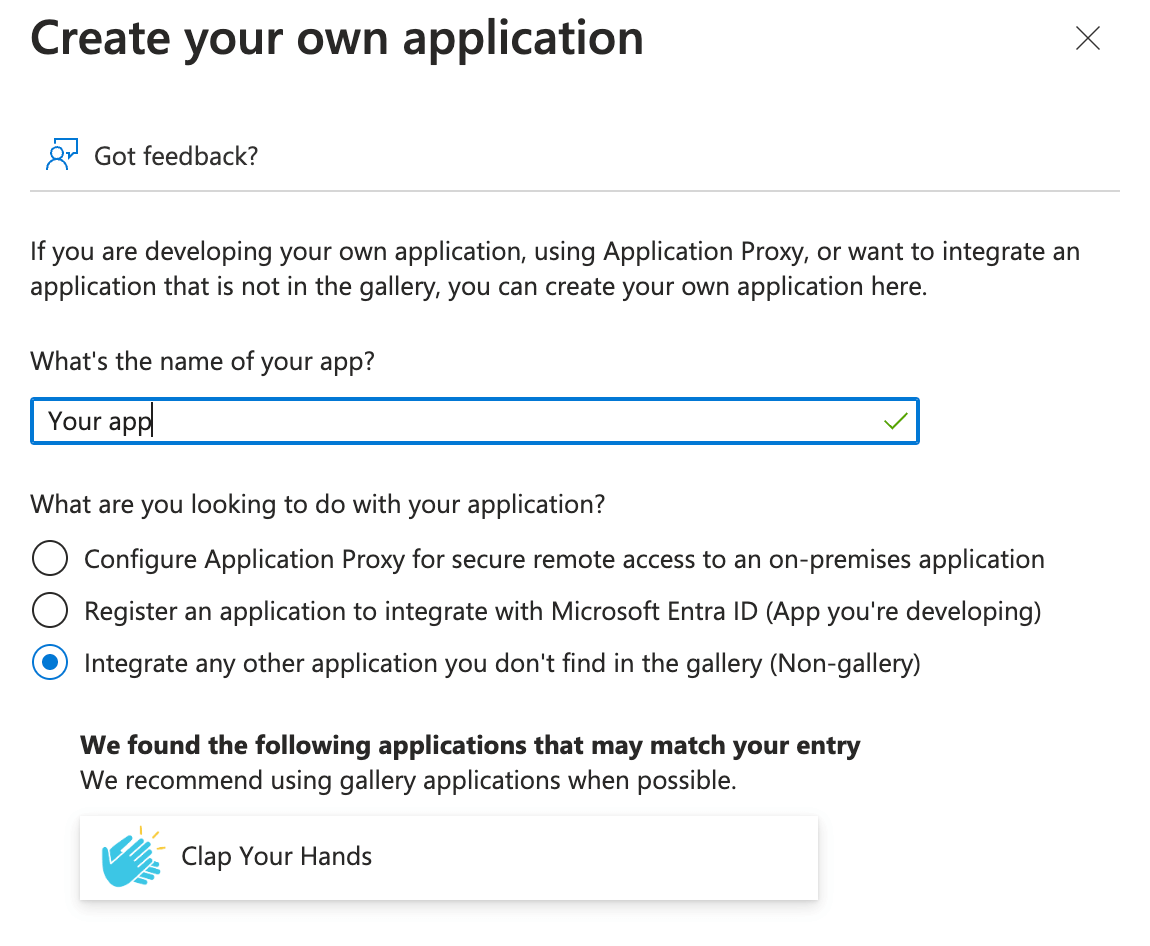
- Provide a name for the application. For example, Staffbase User Provisioning or something similar to help you instantly identify the application.
- Select the option Integrate any other application you don't find in the gallery (Non-gallery).
- Click Create.
You have created an application to provision users using SCIM.
Once you have created the application, you need to establish a connection from Microsoft Entra ID to your Staffbase platform in order to start automatic user accounts provisioning using the application. Learn how application provisioning works in Microsoft Entra ID.
- In the enterprise application you created, navigate to Overview.
- Under Provision User Accounts, click Get started.
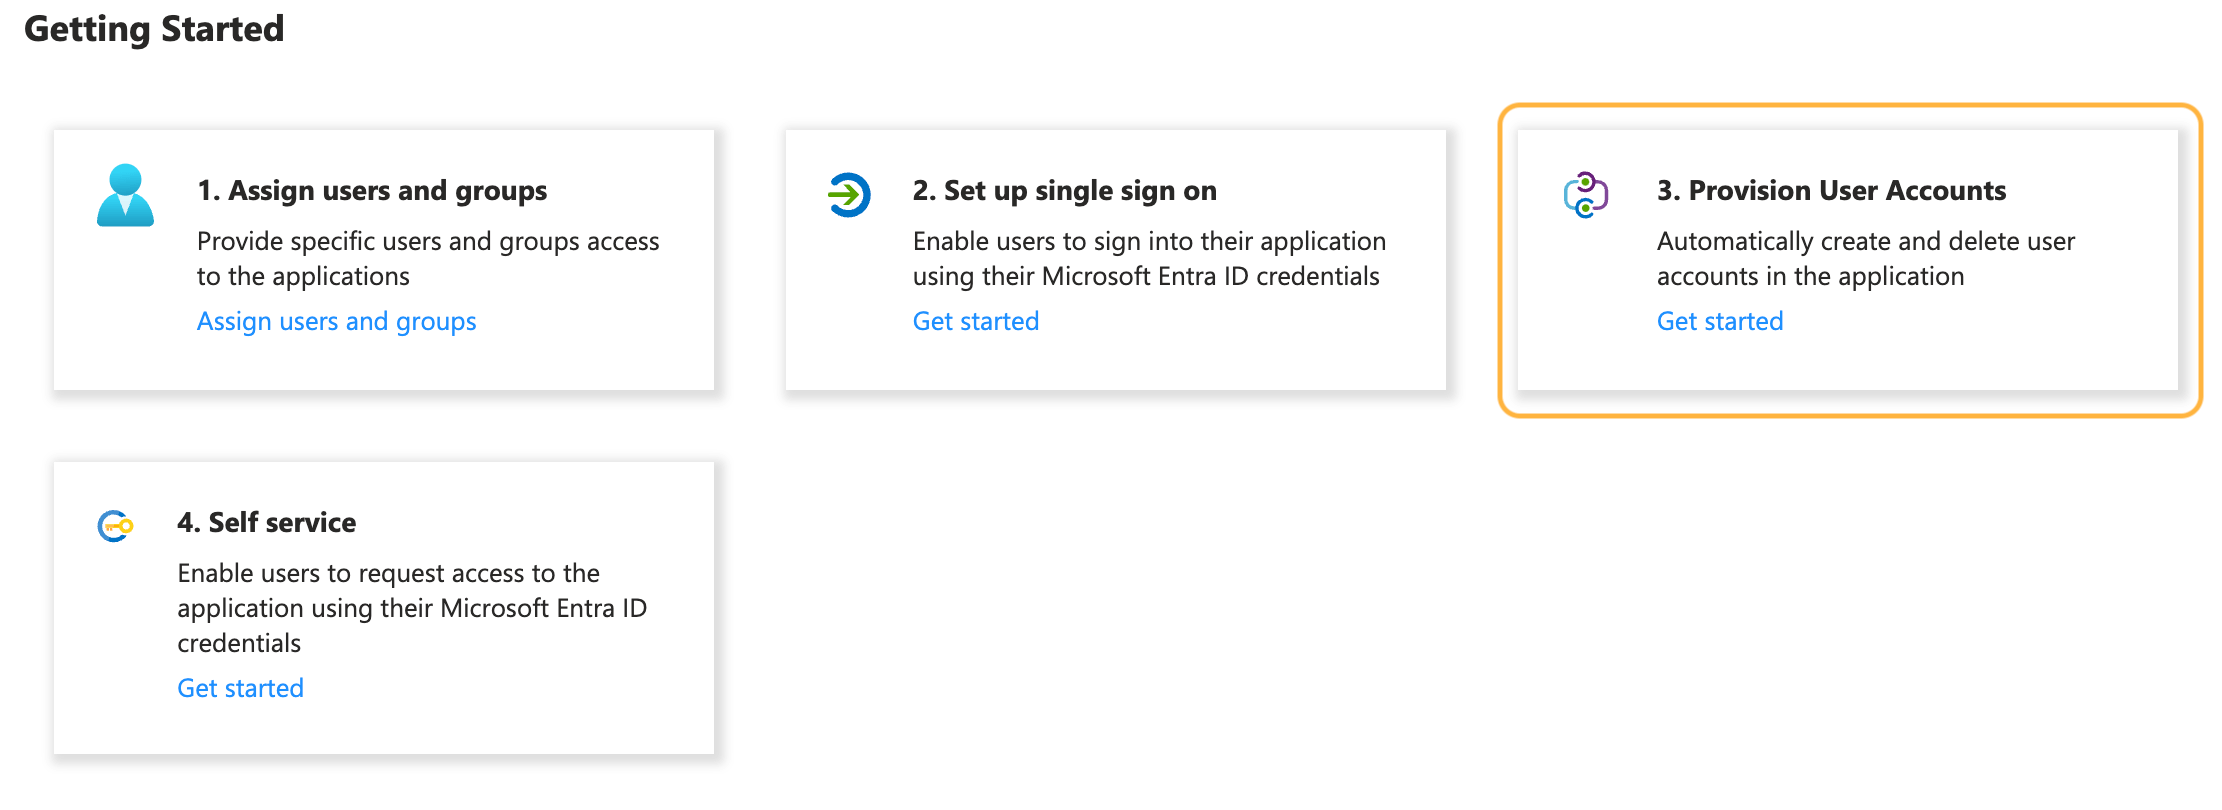
The Provisioning page opens. 3. Click Get started. 4. From the Provisioning Mode dropdown menu, select Automatic.

- Under Tenant URL, paste your SCIM endpoint URL for your Staffbase platform.
For example, the URL uses the following format: ofhttps://<your-domain>/scim - Under Secret Token, paste the API token with administrative access.
- Click Test Connection.
If the connection does not work, ensure that:
- the SCIM feature is enabled for your organization.
- the SCIM endpoint URL is correct.
- the API token is valid and has administrative access.
- Click Save once the connection is successfully created.
The Mappings and Settings tabs open. You have created automatic provisioning for the application. Now, you need to define the mapping for user provisioning.
After creating automatic user provisioning, you need to define the mapping for the provisioning by mapping the source attribute to the target attribute. In this, the source attribute is the attribute of the user in Microsoft Entra ID. The target attribute is the attribute of the user that is sent from Microsoft Entra ID to the Staffbase platform.
Learn more about how to customize user provisioning attribute-mappings in Microsoft Entra ID.
For an overview of default attribute mappings, see SCIM Default Attribute Mappings.
In this guide, only a minimum mapping to get you started is shown.
You can create more mappings based on your business needs.
- Expand the Mappings section in the enterprise application you created and click Provision Microsoft Entra ID Users.
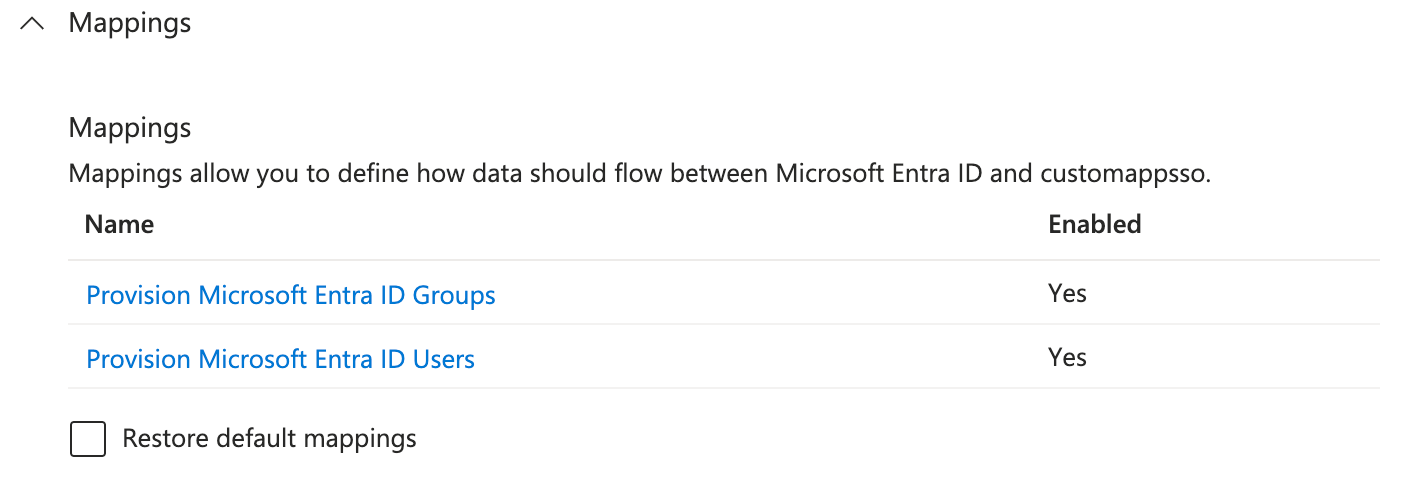
- Keep the following source attributes and delete the rest:
userPrincipalNameSwitch([IsSoftDeleted], , "False", "True", "True", "False")jobTitlemailgivenNamesurnamecitymobiledepartmentmanager
For the default mapping of the Location system field, city is defined as an input type Address in Staffbase. But if you do not want that, you can use a custom attribute.
If you want to use the system field Public Email in addition, you can work with a custom attribute based on the default attribute mapping for this field.
After deleting attributes that are not required, the resulting mapping will look like this:

- Click
userPrincipalName.
The Edit Attribute opens. - From the Target Attribute dropdown menu, select
externalID.
You must include the identifier (externalId) as a target attribute, and it should have a Matching precedence of 1 in the mapping.
If you already have existing users in the platform, ensure the identifiers are set and match the set precedence.

The Source attribute for the externalId can be different depending on which value externalId should have in your Staffbase platform.
- Click OK.
- Click Save.
Ensure to save the changes after you add each mapping.
The final result will look like this:

You have created the minimum mapping required to get you started with provisioning users.
You can optionally add the user's locale to the attribute mapping you have created in the previous section.
-
Click
Add New Mapping.
The Edit Attribute opens. -
From the Source Attribute dropdown menu, select
preferredLanguage.
You can also select a different source attribute that contains the user's language. It must be a valid locale code like: en_US or it_IT.
All supported locale codes can be found here.
- Optionally, set Default value if null (optional).
- From the Target Attribute dropdown menu, select
locale. - From the Apply this mapping dropdown menu select
Only during object creationto prevent overwriting existing language preferences users may have set upon registration.
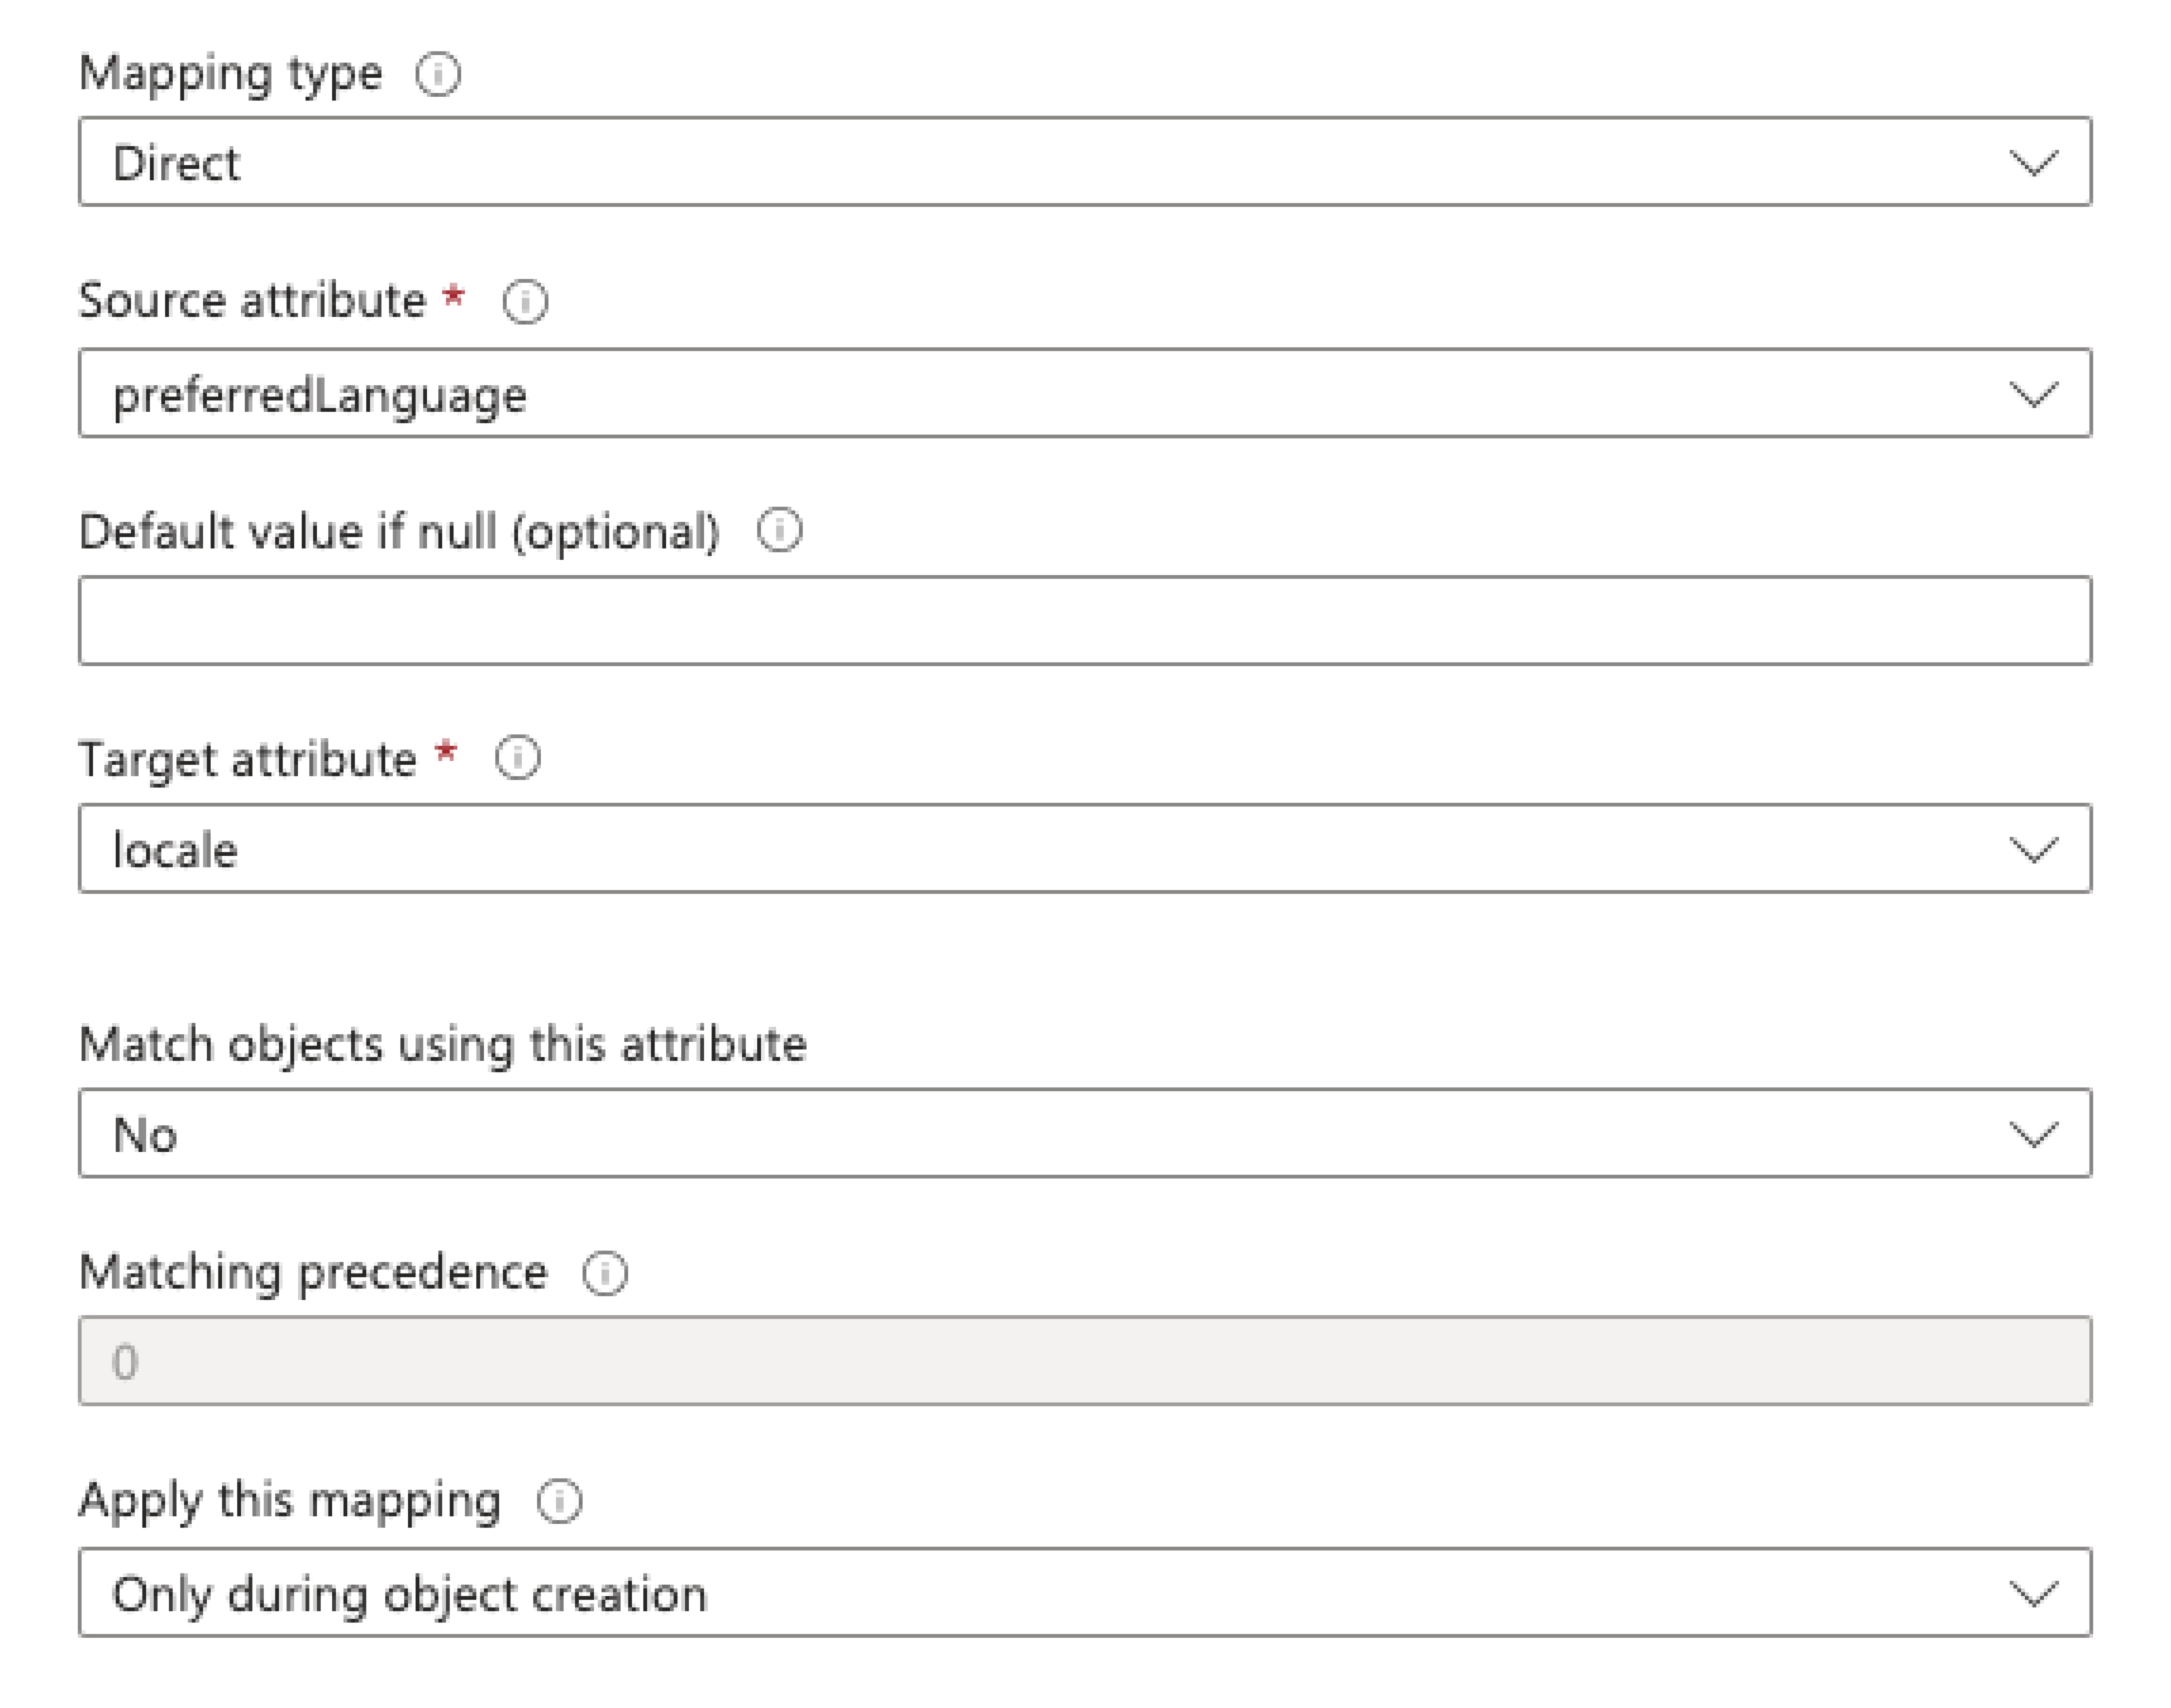
- Click OK.
- Click Save.
After mapping, you can assign users and prepare them for provisioning.
Learn more about how to assign users and groups to an enterprise application in Microsoft Entra ID.
Staffbase recommends starting with on-demand provisioning of a few users to test everything works as expected.
- In the enterprise application you created, click Users and groups.
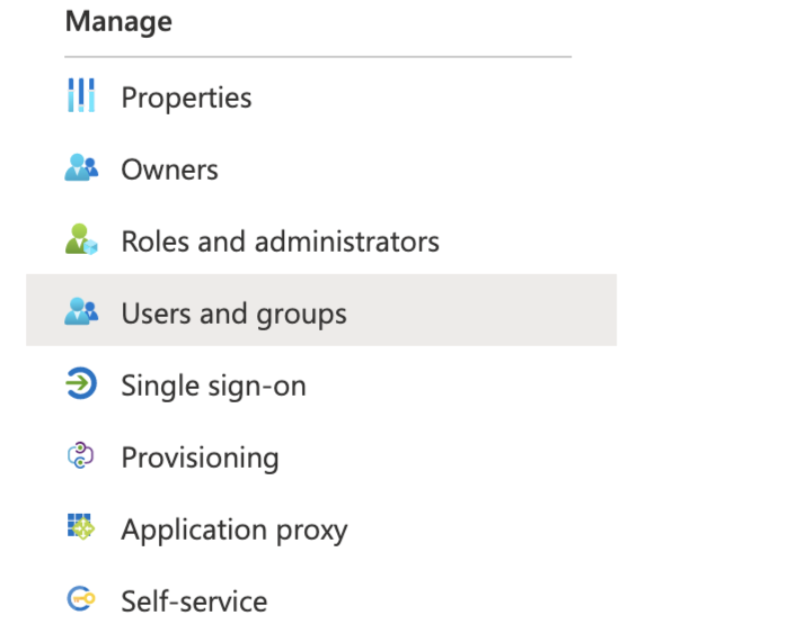
The Users and groups page opens.
- Click Add user/group.
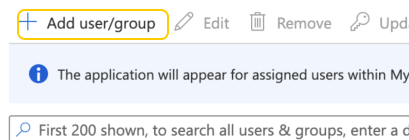
- Click None Selected.
The Users and groups dialog opens. - Search for the user or group you want to add and click Select.

- Click Assign.
You have assigned users or groups to the application.
After assigning users, provision one or two users on-demand to see if it works as expected.
Learn more about on-demand provisioning in Microsoft Entra ID.
- In the enterprise application you created, click Provisioning.
The Provisioning page opens. - Click Provision on demand.
The Provision on demand page opens.

- Search and select the user you want to provision.
All users you added to the application can be provisioned.
- Click Provision.
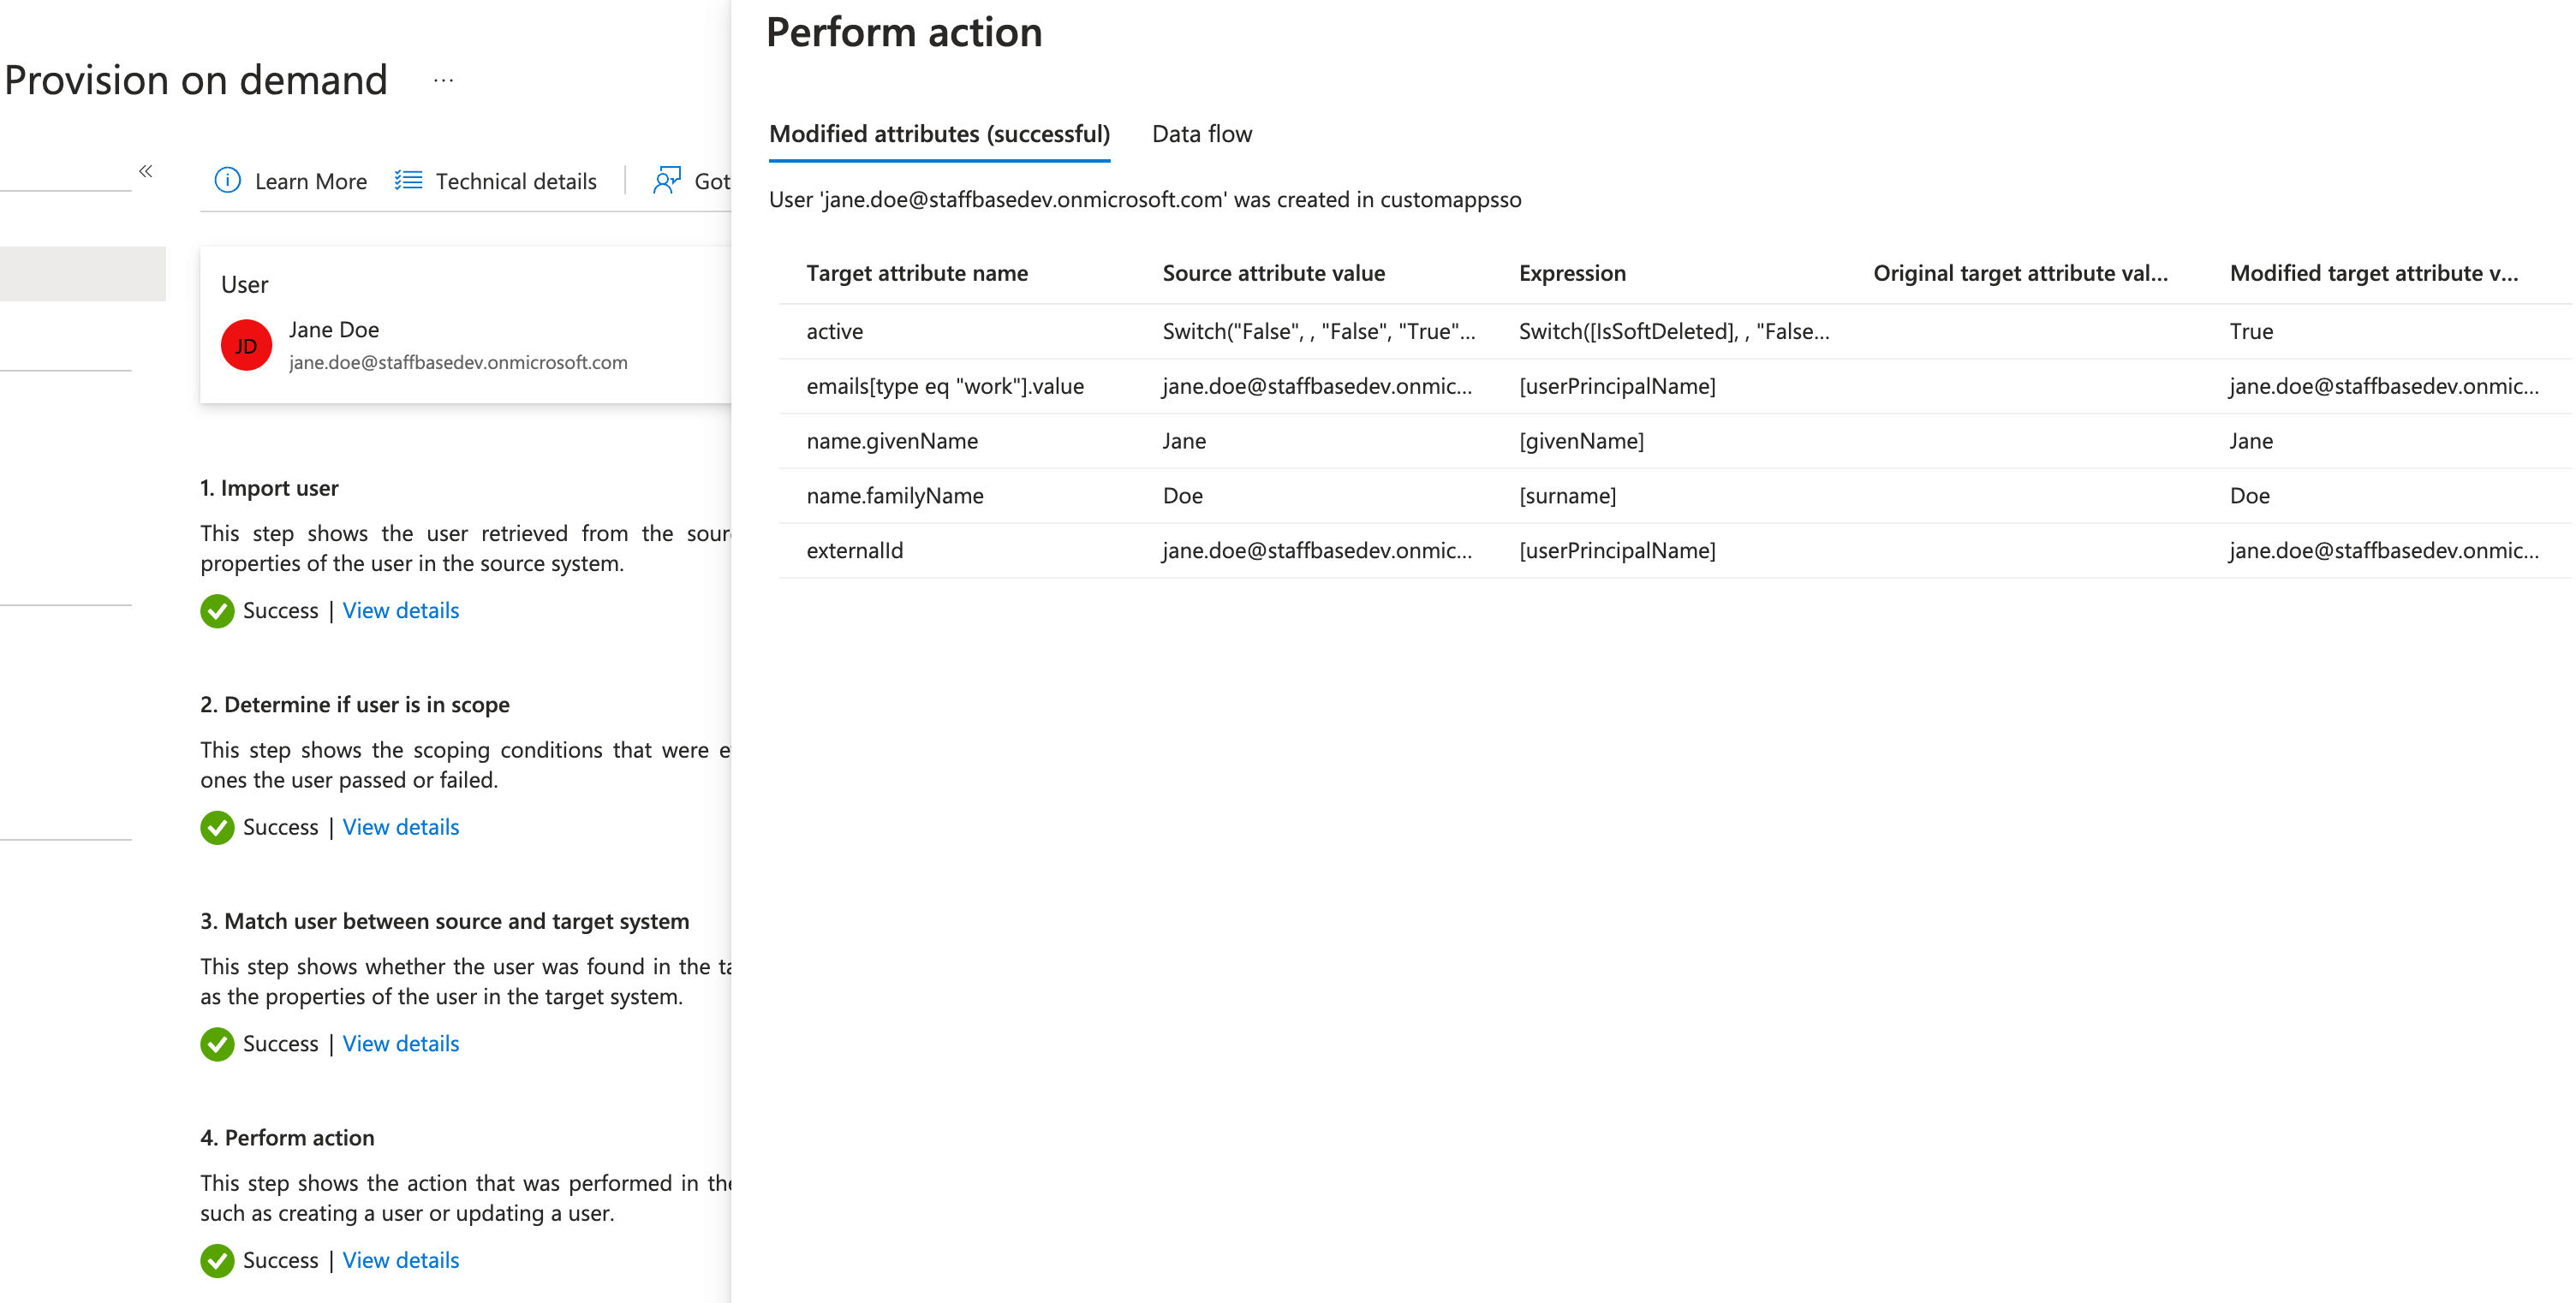
You have provisioned the user to the Staffbase platform.
You can find the provisioned user under the Registered Users section in the Staffbase Studio. If the provisioned user is new, you can find the user under Pending Users.
Test with on-demand provisioning to ensure everything works as expected. You can configure more mappings depending on your business requirements. Learn more about it here. After testing it again, you can configure automatic provisioning.
- In the enterprise application you created, click Provisioning.
The Provisioning page opens. - Click Start provisioning.
Provisioning cycles usually last 40 minutes. Click Refresh to see the provisioning status.
The provisioning logs might take some time to update after provisioning is complete.
Learn more about how long will it take to provision users.
The Microsoft Entra ID provisioning service includes a feature to help avoid accidental deletions. This feature ensures that users aren't disabled or deleted in an application unexpectedly.
Learn more about accidental deletions prevention.
You have automatically provisioned users added to the application.
The provisioning service supports both deleting and disabling users (sometimes referred to as soft-deleting). A delete indicates that the user has been removed completely from the application. A disable is a request to set the active property to false on a user, thereby deactivating the user in Staffbase.
Learn more about deprovisioning and understand the different scenarios that trigger a disable or a delete.
If you have left the default mapping for groups enabled during your user provisioning, the selected groups will also be made available to the Staffbase platform.
In general, you don't need to customize the mapping for groups itself, except to make sure it is enabled if you want to make groups available in addition to users.

In the Staffbase platform, the groups will always be a Manual Internal Group.
If you have kept the default mappings, the Identifier of the group is the Object Id of the Microsoft Entra ID group and the group name has the prefix [SCIM] followed by the display name of the Microsoft Entra ID group.

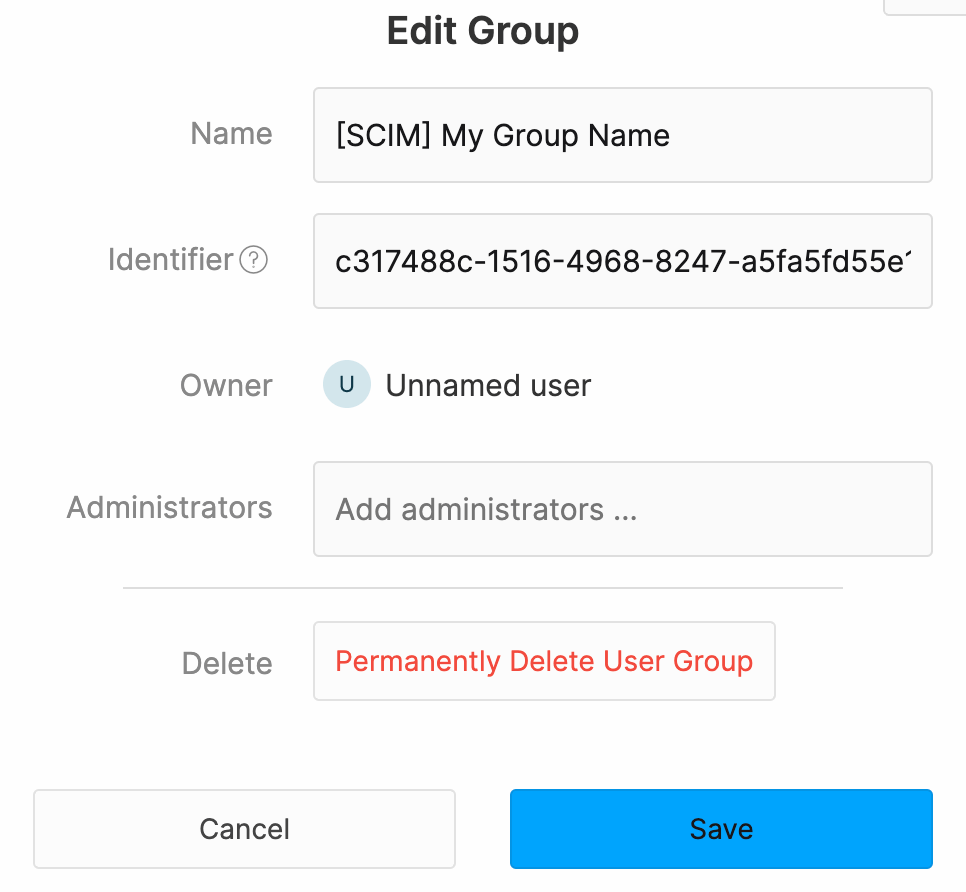
- Nested groups are not supported by the Microsoft Entra ID provisioning: How Application Provisioning works in Microsoft Entra ID
- Known Limitations of on-demand provisioning of groups: On-demand provisioning in Microsoft Entra ID
- SCIM Protocol
- How Application Provisioning Works in Microsoft Entra ID
- Overview Entra ID built-in Roles
- Customize user provisioning attribute-mappings in Microsoft Entra ID
- Assign users and groups to an enterprise application in Microsoft Entra ID
- On-demand provisioning in Microsoft Entra ID
- Provisioning logs in Microsoft Entra ID
- How long will it take to provision users with Microsoft Entra ID
- Enable accidental deletions prevention in the Entra ID provisioning service
- Troubleshooting