Learn how to configure Single Sign-On using SAML protocol in Microsoft Entra ID to authenticate users to your Staffbase platform.
In this article, you will learn how to set up SSO using the SAML protocol in Microsoft Entra ID (formerly known as Azure Active Directory / Azure AD). SSO is an authentication method that allows users access to multiple applications with a single account. This will allow you to onboard your users using SSO and let them access the Staffbase platform using the same credentials they use to access other platforms in your organization.
SSO is optional for user management. You can choose an option based on your business requirements. Learn more about other options.
- You have an Entra ID tenant.
- You have one of the following permissions to configure provisioning in Entra ID:
- Application Administrator
- Cloud Application Administrator
- Global Administrator
You need to create an enterprise application in Entra ID to set up SSO.
Staffbase recommends creating a dedicated application to maintain users for your Staffbase platform. If you want to configure SCIM for user provisioning, you are able to use a single enterprise application for both SSO and SCIM for your user management.
- In Microsoft Azure, under Azure services, click Microsoft Entra ID.
- Navigate to Enterprise applications.
- Click New application.
- Click Create your own application.
The Create your own application dialog opens.
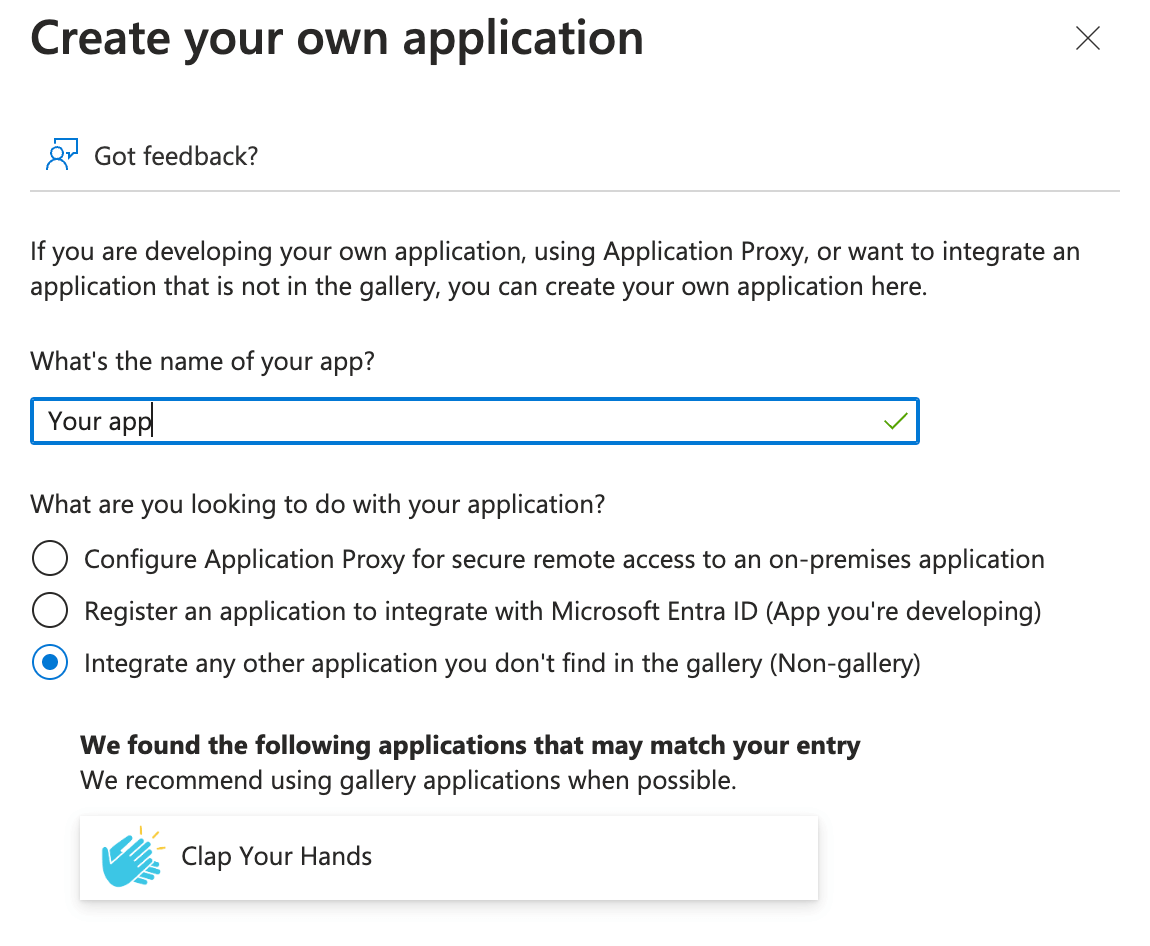
- Provide a name for the application. For example, Staffbase SSO or something similar to help you instantly identify the application.
- Select Integrate any other application you don't find in the gallery (Non-gallery).
- Click Create.
You have created an application to authenticate users using SSO.
After creating the enterprise application, you can decide on which Entra ID users need access to the Staffbase platform using SSO.
Staffbase recommends adding a few users initially to test that everything works as expected.
- In the enterprise application you created, click Users and groups.
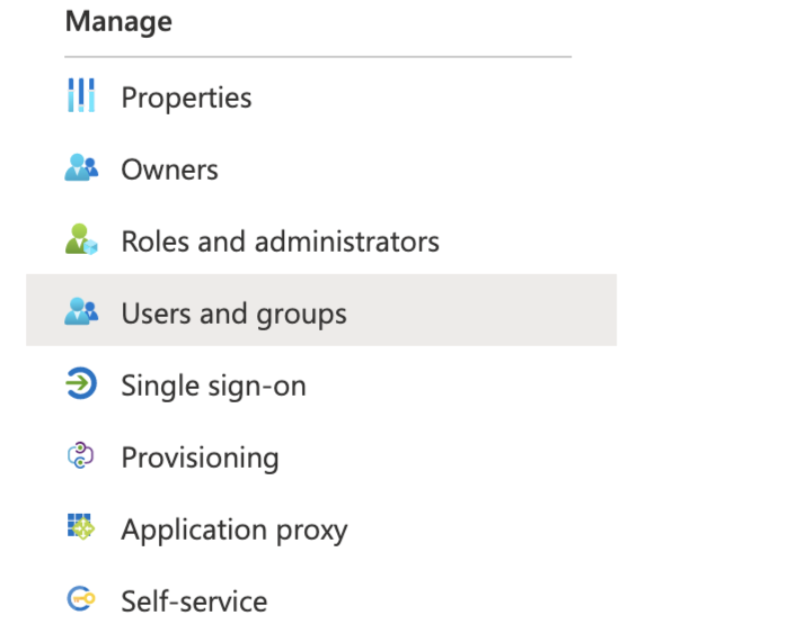
The Users and groups page opens.
- Click Add user/group.
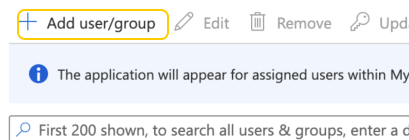
- Click None Selected.
The Users and groups dialog opens. - Search for the user or group you want to add and click Select.

- Click Assign.
You have assigned users or groups to the application.
Once you have created the application, you need to define the SAML protocol.
Learn how the Microsoft identity platform uses the SAML protocol.
- In the enterprise application, navigate to Overview.
- Under Set up single sign on, click Get Started.
- Select SAML as the single sign-on method.
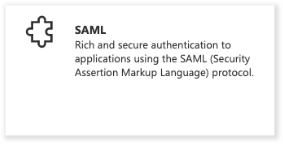
The Set up Single Sign-On with SAML page opens.
To continue the setup process, you will need to work closely with the Staffbase Support team. First, contact the team and inform them that you're setting up SSO with Entra ID. You will receive the information needed to proceed with the setup and have to provide them with the information listed below.
To continue setting up SSO with SAML, you need to:
You will receive the following to complete the SSO setup:
- Reply URL (Assertion Consumer Service URL): The Reply URL directs Entra ID where to send its SAML Response after authenticating a user.
- Identifier (Entity ID): The Identifier acts as a unique identifier for your Staffbase platform domain in Entra ID.
Provide the following information to Staffbase:
- App Federation Metadata Url
You can copy App Federation Metadata Url from Set up Single Sign-On with SAML page under the SAML Signing Certificate section.
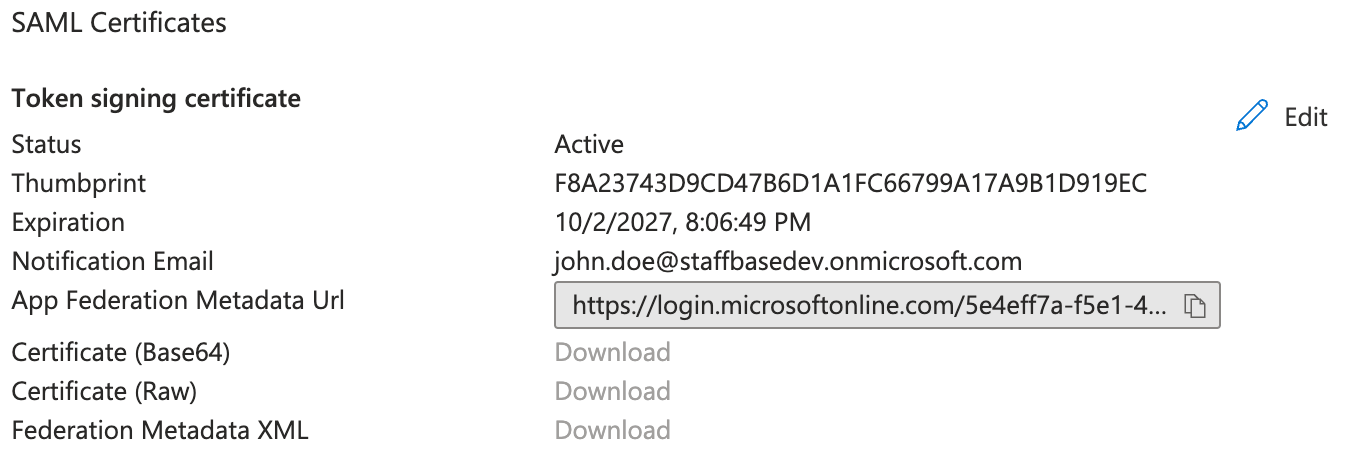
For now, you can ignore the warning that you need to complete Step 1 before adjusting the other Steps. You will get the details in order to complete the other steps after you provide all the required information to Staffbase Support.
- Your Entra ID session lifetime
If the session lifetime is not configured, you are using the default session lifetime. Learn more here.
Staffbase recommends disabling persistent browser sessions, as they could lead to sign-in issues for users with older sessions. Notify your Staffbase Support team if it cannot be disabled.
After receiving the information from Staffbase, you can complete the SSO configuration.
- In the Set up Single Sign-On with SAML page, click Edit under Basic SAML Configuration.

- Enter the Identifier (Entity ID) and Reply URL (Assertion Consumer Service URL) you received from Staffbase.
- Under SAML Signing Certificate, click Edit.
The Attributes & Claims page opens.
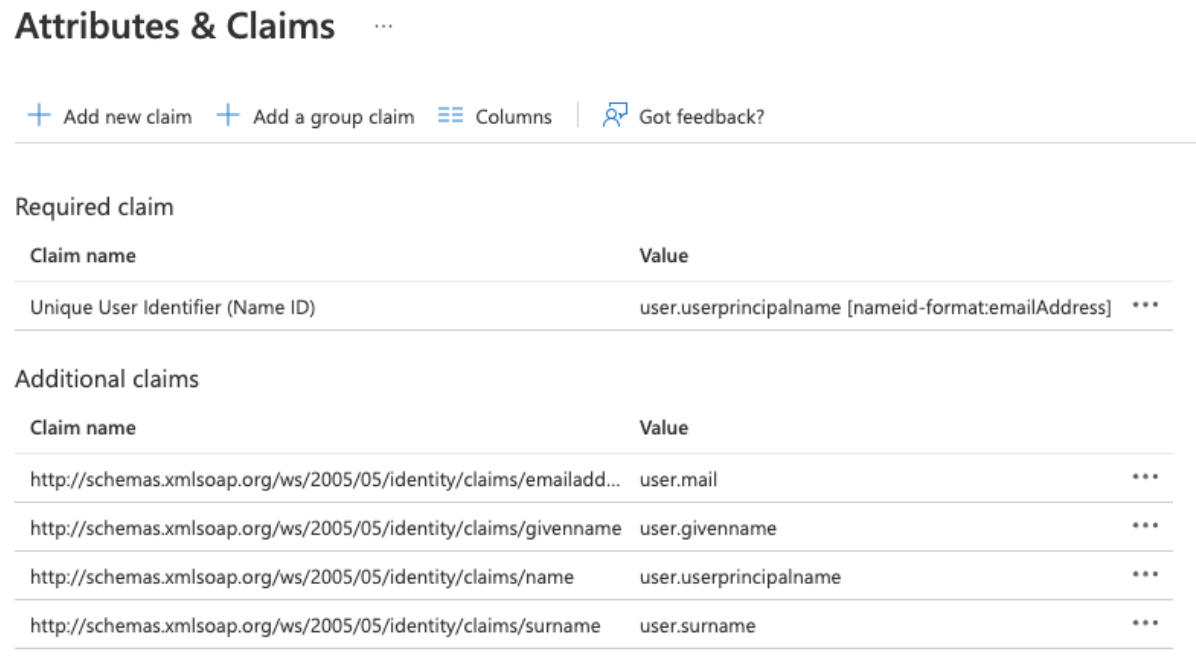
You can modify a claim and adjust its values according to your business requirements.
At minimum, you need the following claims configured:
The Unique User Identifier (Name ID) value and the identifier in your Staffbase platform must match for each user using SSO.
If you want to use a different value from the one already in place for your users in your Staffbase platform, you will need to update the user identifiers in your Staffbase platform first. In such a case, ensure that all future user management also includes these new identifiers.
-
Click Add new claim.
The Manage claim dialog opens.
-
Provide a name and assign a Source attribute for the claim.
The values are auto-filled based on your enterprise application and Entra ID tenant.
The values are auto-filled based on your enterprise application and Entra ID tenant.
- Under Test single sign-on, click Test.
- Select a way to test sign in and click Test sign in. The sign in page opens for you to test.
- Ensure the sign in functions as expected.
After testing the SSO authentication works as expected, you can add all users in Entra ID to the enterprise application.
- In the enterprise application you created, click Properties.
- Set Assignment required? to No.

- Click Save.
You have configured and enable SSO for your Staffbase platform.
You can configure the SAML domain hints to ensure that users don't attempt to authenticate with the identity provider (IdP) using domains that are not allowed when using the Staffbase platform. To activate this feature, contact Staffbase Support or your Customer Success Manager. Learn more about domain hints.